The interface that end users use to search the index is known as a "search application". Exalead CloudView includes a default search application known as the Mashup UI, and a tool to modify it, the Mashup Builder.
For this tutorial, we will use the Mashup Builder to modify the default Mashup UI.
Mashup Builder is a tool that enables you to build search applications.
Each application is composed of pages. For each page, you can configure:
• The data sources to use, called Feeds.
• The structure of the page, called Design, where you can display feed content in widgets.
The default application that installs with Exalead CloudView contains two pages:
• The /index page, which is the home page,
• and the /search page, which displays the search results.
Modify the Display of Hit Titles
First, let us improve how the hits display in the Mashup UI with dynamic titles.
By default, the title that displays for each hit is based on this value ${entry.metas['title']|entry.metas['url']} where title and url are default meta names. This expression is defined using the Mashup Expression Language (MEL).
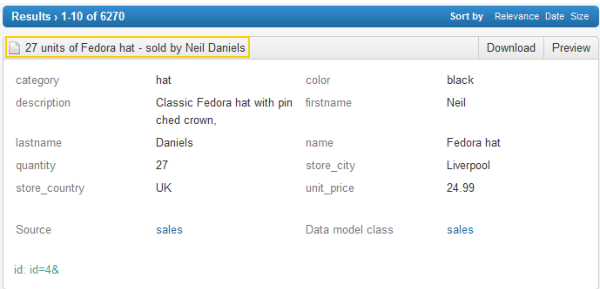
Our sales class does not have a title meta and the url meta displayed by default (as id=<integer>&) is not meaningful. We want to display the quantity of each product sold by salesmen and saleswomen.
Tutorial: Display the Quantity of Each Product Sold by Sales People
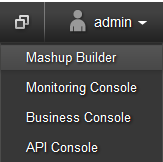
1. Open Mashup Builder.
◦ Go to http://<HOSTNAME>:<BASEPORT+1>/mashup-builder
◦ Or from the Administration Console top bar, use the application selector.
2. In Mashup Builder, select the /search page, and then the Design view.
3. Click the header of the Result List widget.
4. On the widget properties panel, define the value of the Hit title field as follows:
${entry.metas['quantity']} units of ${entry.metas['name']} - sold by ${entry.metas['firstname']} ${entry.metas['lastname']}
To build this expression, select the Exalead CloudView metas from the dynamic list on the left.
5. Remove the thumbnails, as our database records do not have images.
a. Select the Hit thumbnailtab.
b. In Display thumbnails, select none.
6. Click Apply.
Tutorial: Check the Display of Hit Titles
1. Go to the Mashup UI search page: http://<HOSTNAME>:<BASEPORT>/mashup-ui/page/search?q=
2. Refresh the /search page to view the results of your changes.
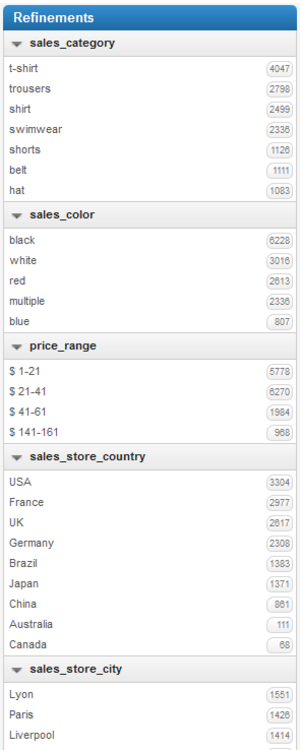
Change the Navigation Facets Order
Changing the order of navigation facets is one of the most common actions you want to perform when configuring your Mashup UI application. You can specify this sorting for each page of the application.
Tutorial: Change the Navigation Facets Order in the Refinements Panel
Current order
Order we want
price_range
sales_category
sales_store_city
sales_color
sales_color
price_range
sales_category
sales_store_country
sales_store_country
sales_store_city
1. In Mashup Builder, go to the /search page and select the Design view.
2. Click the header of the Standard Facets widget. This is the widget used by default for the Refinements panel.
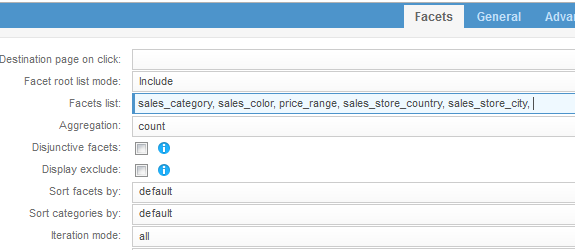
3. Specify explicitly the facets to include in the widget:
a. In the Facets tab, set Facet root list mode to Include.
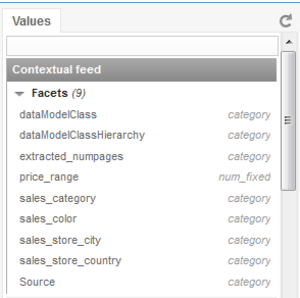
b. Click inside Facets list. A list of available facets displays to the left under Facets.
c. Select sales_category, sales_color, price_range, sales_store_country, sales_store_city
4. Click Apply.
Tutorial: Check the Navigation Facets Display
1. Refresh the /search page in the Mashup UI.
The navigation facets order has changed in the Refinements panel.