Option | Description |
|---|---|
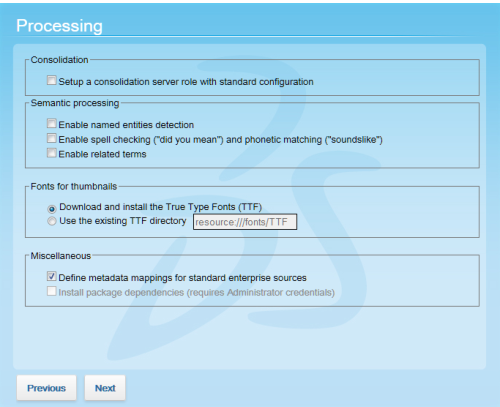
Set up a consolidation server role with standard configuration | Installs a default consolidation server (cs0) in Administration Console > Deployment > Roles > Indexing. |
Enable named entities detection | Analyzes documents to detect named entities: locations, events, people, or organizations during indexing. |
Enable spell checking | Enables "Did you mean" spell checking and phonetic matching (soundslike) for search queries. |
Enable related terms | Analyzes documents to detect related concepts within your corpus during indexing. |
Define metadata mappings for standard enterprise sources | Installs the default data model document class with a predefined configuration for enterprise search. Note: For the Exalead CloudView Getting Started Guide tutorial, clear this option to install Exalead CloudView with an empty document class. |
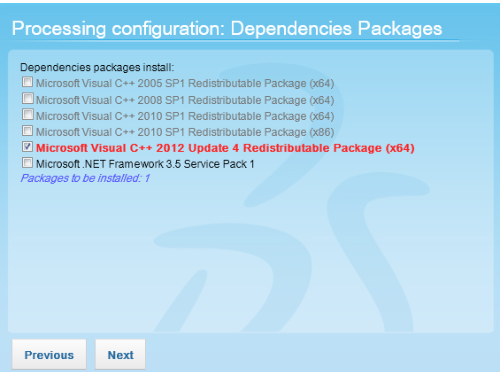
Install package dependencies | (Windows only) Installs several Microsoft redistributable packages. |
Option | Description |
|---|---|
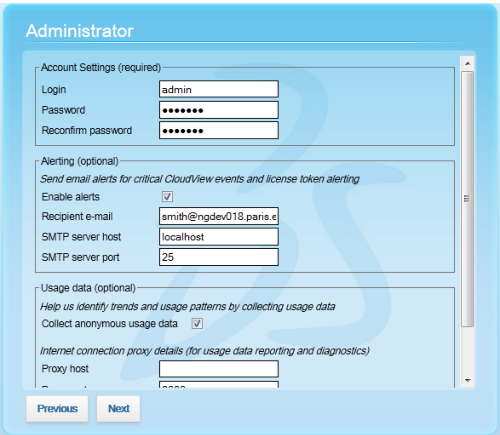
Account settings | Specify the login and password to use when accessing Exalead CloudView. |
Alerting | (Optional) for critical Exalead CloudView events and license issues: specify the recipient email account settings. Note: You can also enable alerts once the installation is complete. For more information, see "Enable alerts if not defined at setup" in the Exalead CloudView Administration Guide. |
Reporting | (Optional) on usage data and diagnostics: specify the proxy host and port. |
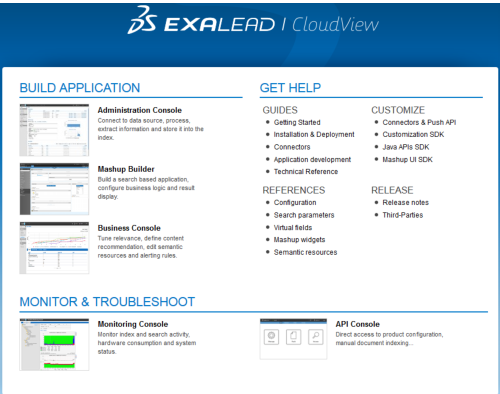
Interface | Available at |
|---|---|
Administration Console | BASEPORT+1/admin |
Mashup Builder | BASEPORT+1/mashup-builder |
Business Console | BASEPORT+1/business-console |
Monitoring Console | BASEPORT+1/perf-ui |
API Console | BASEPORT+1/api-ui |