This section describes how to configure a Mashup application to work in the 3D℠EXPERIENCE.
Configure the 3DSearch Behavior
To configure the search behavior when users run queries in the 3DSearch field, add the 3DEXPERIENCE - Search and Refine widget to the search Mashup page.
1. In the Mashup Builder, select the '/search' page.
2. Go to Widgets > 3DEXPERIENCE.
3. Select the 3DEXPERIENCE - Search and Refine widget and add it to the page.
4. Click the widget header to open the 3DSearch tab of the widget properties.
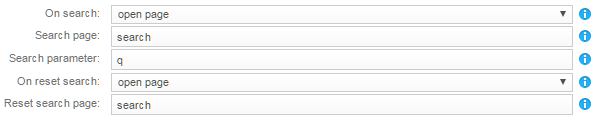
5. For On search, select:
◦ open page to open the Mashup page specified in the Search page parameter and set the page parameter defined in Search parameter to the query string input in the 3DSearch field.
◦ Or run custom code (advanced) to define the Javascript code called when 3DSearch receives the query.
6. In On reset search, specify the behavior when using the red cross or clearing the search in the 3DSearch field (same options as for On search).
Example:
7. Save and apply configuration.
Define the mapping between Facets and 6WTags
You can refine the result list of a Mashup App using the 6WTags.
In Mashup Builder, you can define the mapping between facets and 6WTags:
• Locally, on a specific Mashup page.
• Globally, at the application level.
The following table summarizes the different mapping strategies:
Define mapping on
Mapping definition with
Possibility to share mapping
Tag publishing
widget
list of facets on the UI
none (page-specific)
on page loading
widget
file
app or page
on page loading
tag controller
file
app or page
on-the-fly (AJAX)
Mapping locally using the widget
You can map facets to the 6WTags widget, using the widget configuration parameters.
1. In Mashup Builder, select a page, for example, /search page.
2. Select Widgets > 3DEXPERIENCE.
3. Select the 3DEXPERIENCE - Search and Refine widget and add it to the mashup page.
4. Click the 3DEXPERIENCE - Search and Refine widget header and select the 6WTagger tab.
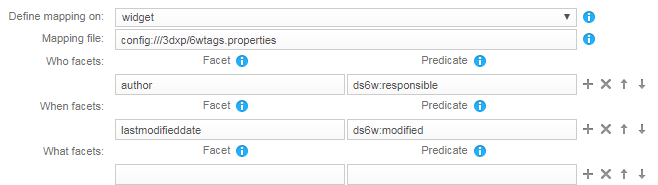
5. For Define mapping on, select the widget option.
Important: With this option, facets are published in the 6WTags only when a Mashup page is loaded. It means that if the Mashup page facets change without reloading the page, the 6WTags do not upload. This limitation impacts Mashup Apps in which widgets and associated feeds are refreshed or executed using asynchronous queries (with AJAX). To update tags dynamically after page loading, use the tag controller option.
6. Specify a mapping file if you want to upload a configuration and override only a few facets using the UI.
3. Drag the 3DEXPERIENCE - Search and Refine widget on your mashup page.
4. For each page, click the 3DEXPERIENCE - Search and Refine widget header and select the 6WTagger tab.
5. For Define mapping on, select the tag controller option.
This option uses AJAX to update tags dynamically after page loading.
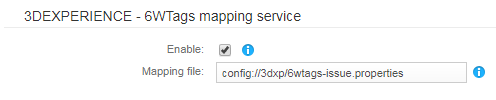
To extend the global 3DEXPERIENCE - 6WTags mapping service, enter the additional JavaScript code in Extra mappings.
6. Click Apply.
Trigger the App Display in the 3DDashboard
You can trigger the display of your Mashup app (show or hide) in the 3DDashboard.
Warning: The HTML preview of multiple MS Excel sheets is not compatible with the embedding of a mashup app in a 3D℠EXPERIENCE Platform widget.
1. In the Mashup Builder, select the '/search' page.
2. Go to Triggers > Pre Request Trigger.
3. Select 3DEXPERIENCE - Detect Context and add it at the top of the /search page.
4. In Propagate 3DExperience context using, select either:
◦ redirect to use the HTTP referrer to propagate the context. It allows you to run an App inside the 3DDashboard in one browser tab, while running the standalone App in a separate browser tab (the cookies do not store the context.)
◦ session to store the detected context in the user session (HTTP cookie). It prevents you to run the Mashup App in the 3DDashboard and the standalone App in the same browser (all tabs share the same cookies).
5. Go to Triggers > Mashup Widget Trigger.
6. Select either:
◦ 3DEXPERIENCE - Hide in context to hide the Mashup App when inside 3D℠EXPERIENCE (for example, in a 3DDashboard).
◦ 3DEXPERIENCE - Show in context to show the Mashup App when inside 3D℠EXPERIENCE (for example, in a 3DDashboard).
7. Save and apply configuration.
User Authentication from 3DPassport
To authenticate users from the 3DPassport using an SSO mechanism, first configure the security source in the Mashup Builder and then add the 3DPassport SSL certificate to the Exalead CloudView trusted keystore.
Configure the security source
1. In the Mashup Builder, go to Application > General > Security.
2. Click Add a security provider.
3. Select CAS Security Provider and click OK.
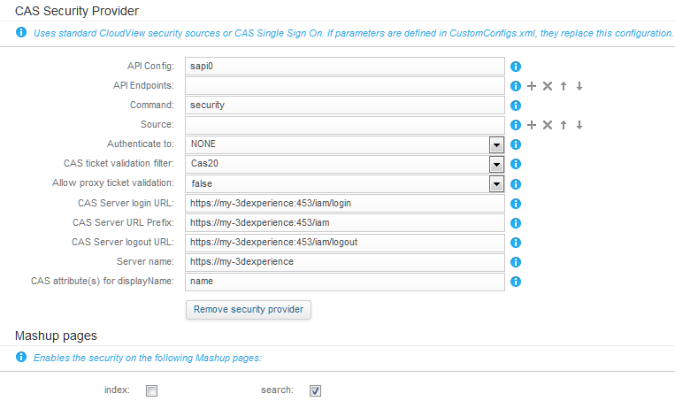
4. In the CAS Security Provider section, configure the following parameters:
a. In Authenticate to, select None.
b. In CAS ticket validation filter, select Cas20.
c. In Allow proxy ticket validation, select false.
d. In CAS Server login URL, enter https://<HOSTNAME>:<PORT>/iam/login
e. In CAS Server URL Prefix, enter https://<HOSTNAME>:<PORT>/iam
f. In CAS Server logout URL, enter https://<HOSTNAME>:<PORT>/logout
g. In Server Name, enter https://<HOSTNAME>.
h. In CAS attribute(s) for displayName, enter name.
5. In the Mashup pages section, select the check-box corresponding to the search page.
Configuration:
6. Click Apply.
Add 3DPassport SSL certificate to Exalead CloudView
1. Verify the certificate format using the following command: